 Henrik Carlsson posted this
photo
on
and tagged it with Midnight Swim snapshots Sundborn
Henrik Carlsson posted this
photo
on
and tagged it with Midnight Swim snapshots Sundborn  Henrik Carlsson posted this
photo
on
and tagged it with Midnight Swim snapshots Sundborn Henrik Carlsson posted this
article
on
and tagged it with Midnight Swim Sundborn
Henrik Carlsson posted this
photo
on
and tagged it with Midnight Swim snapshots Sundborn Henrik Carlsson posted this
article
on
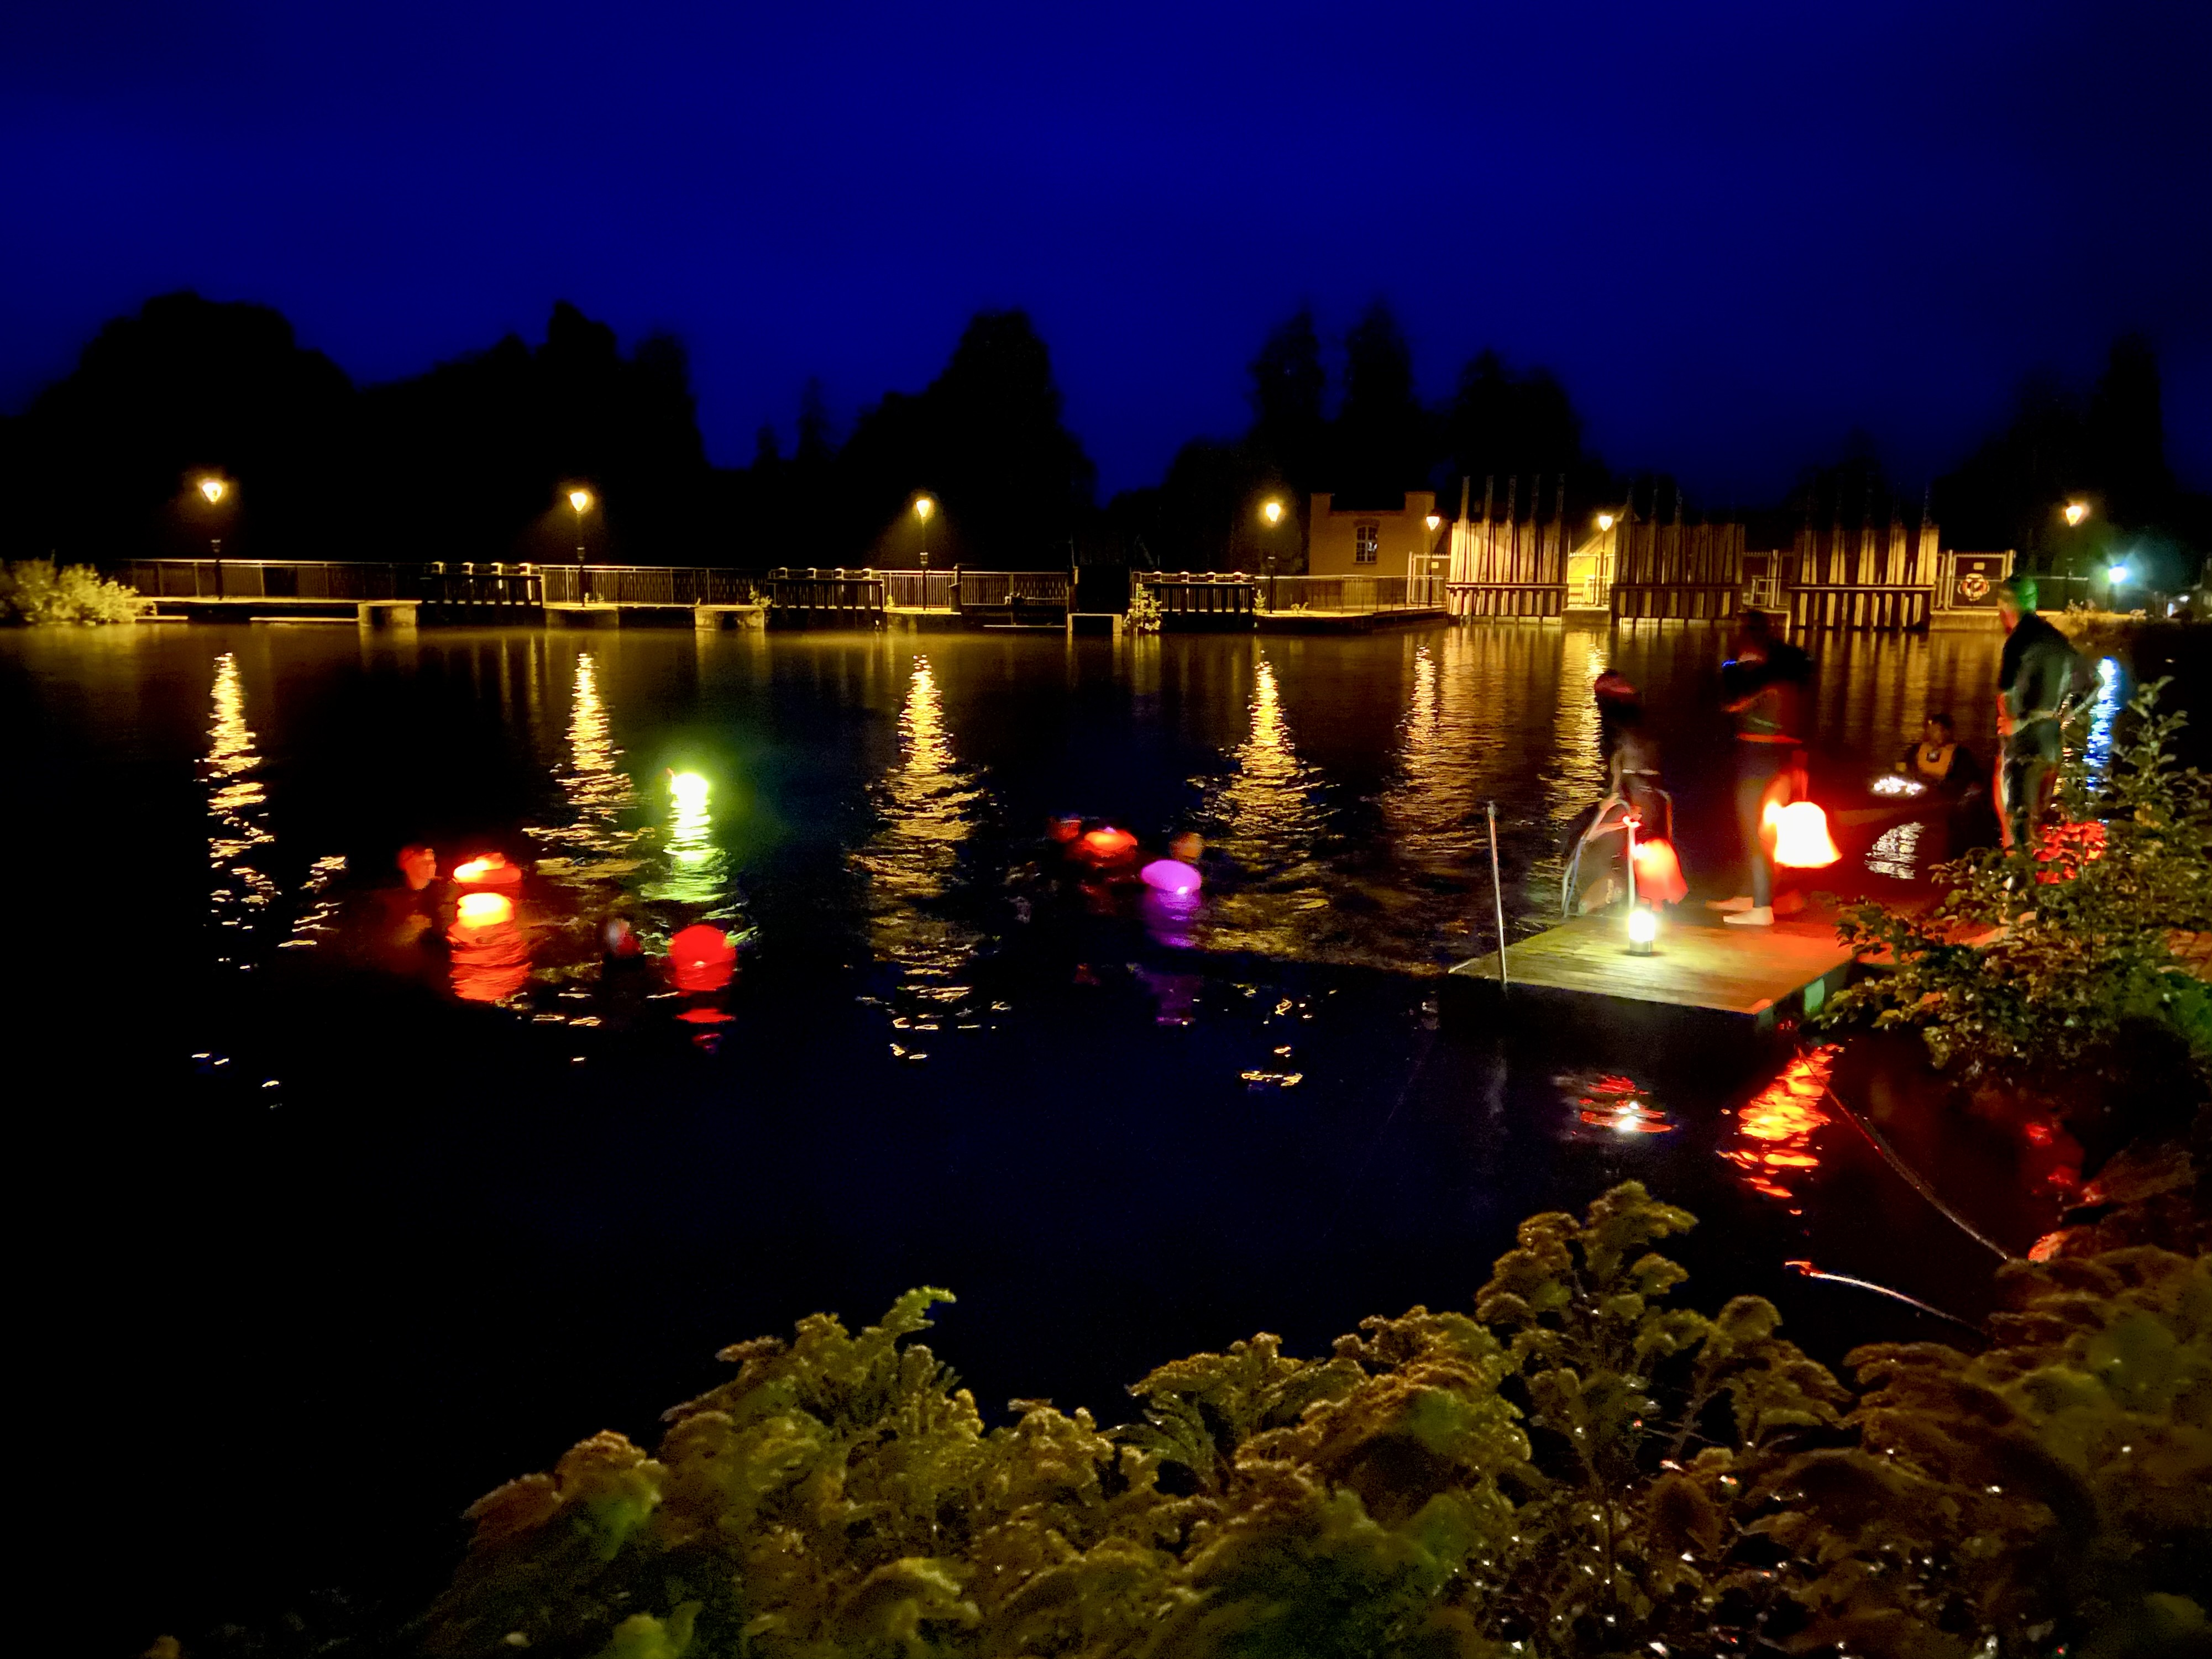
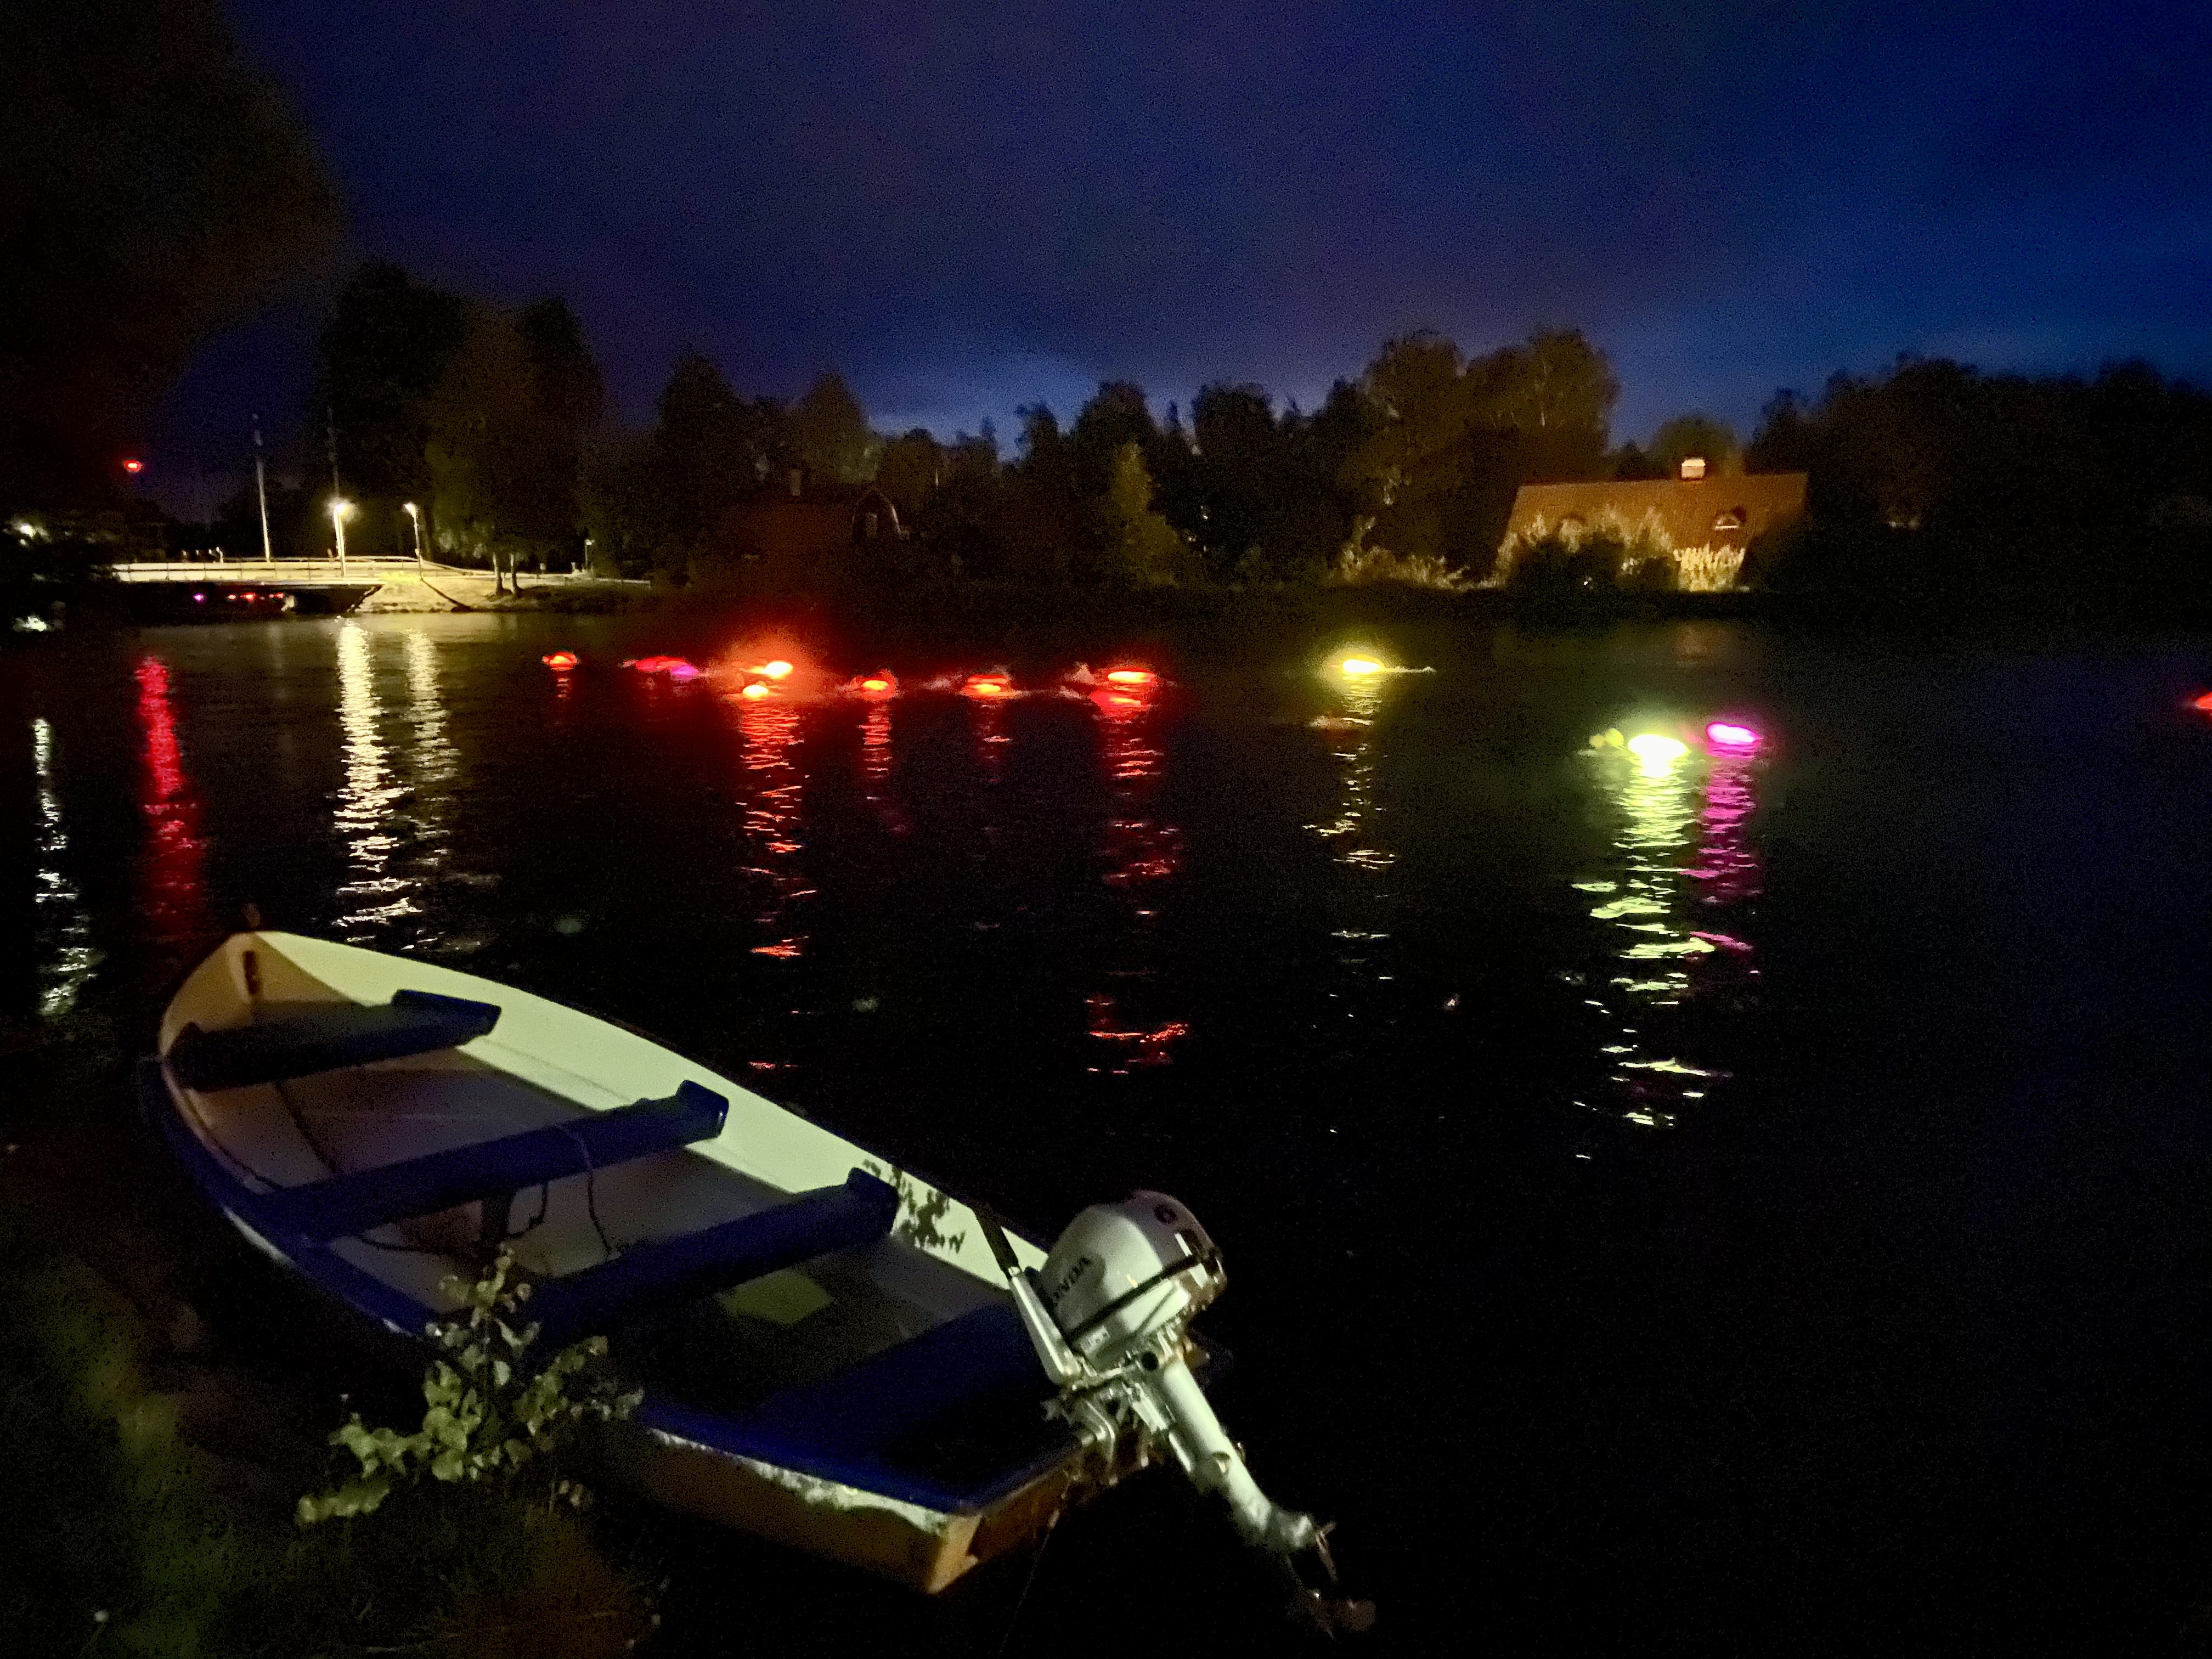
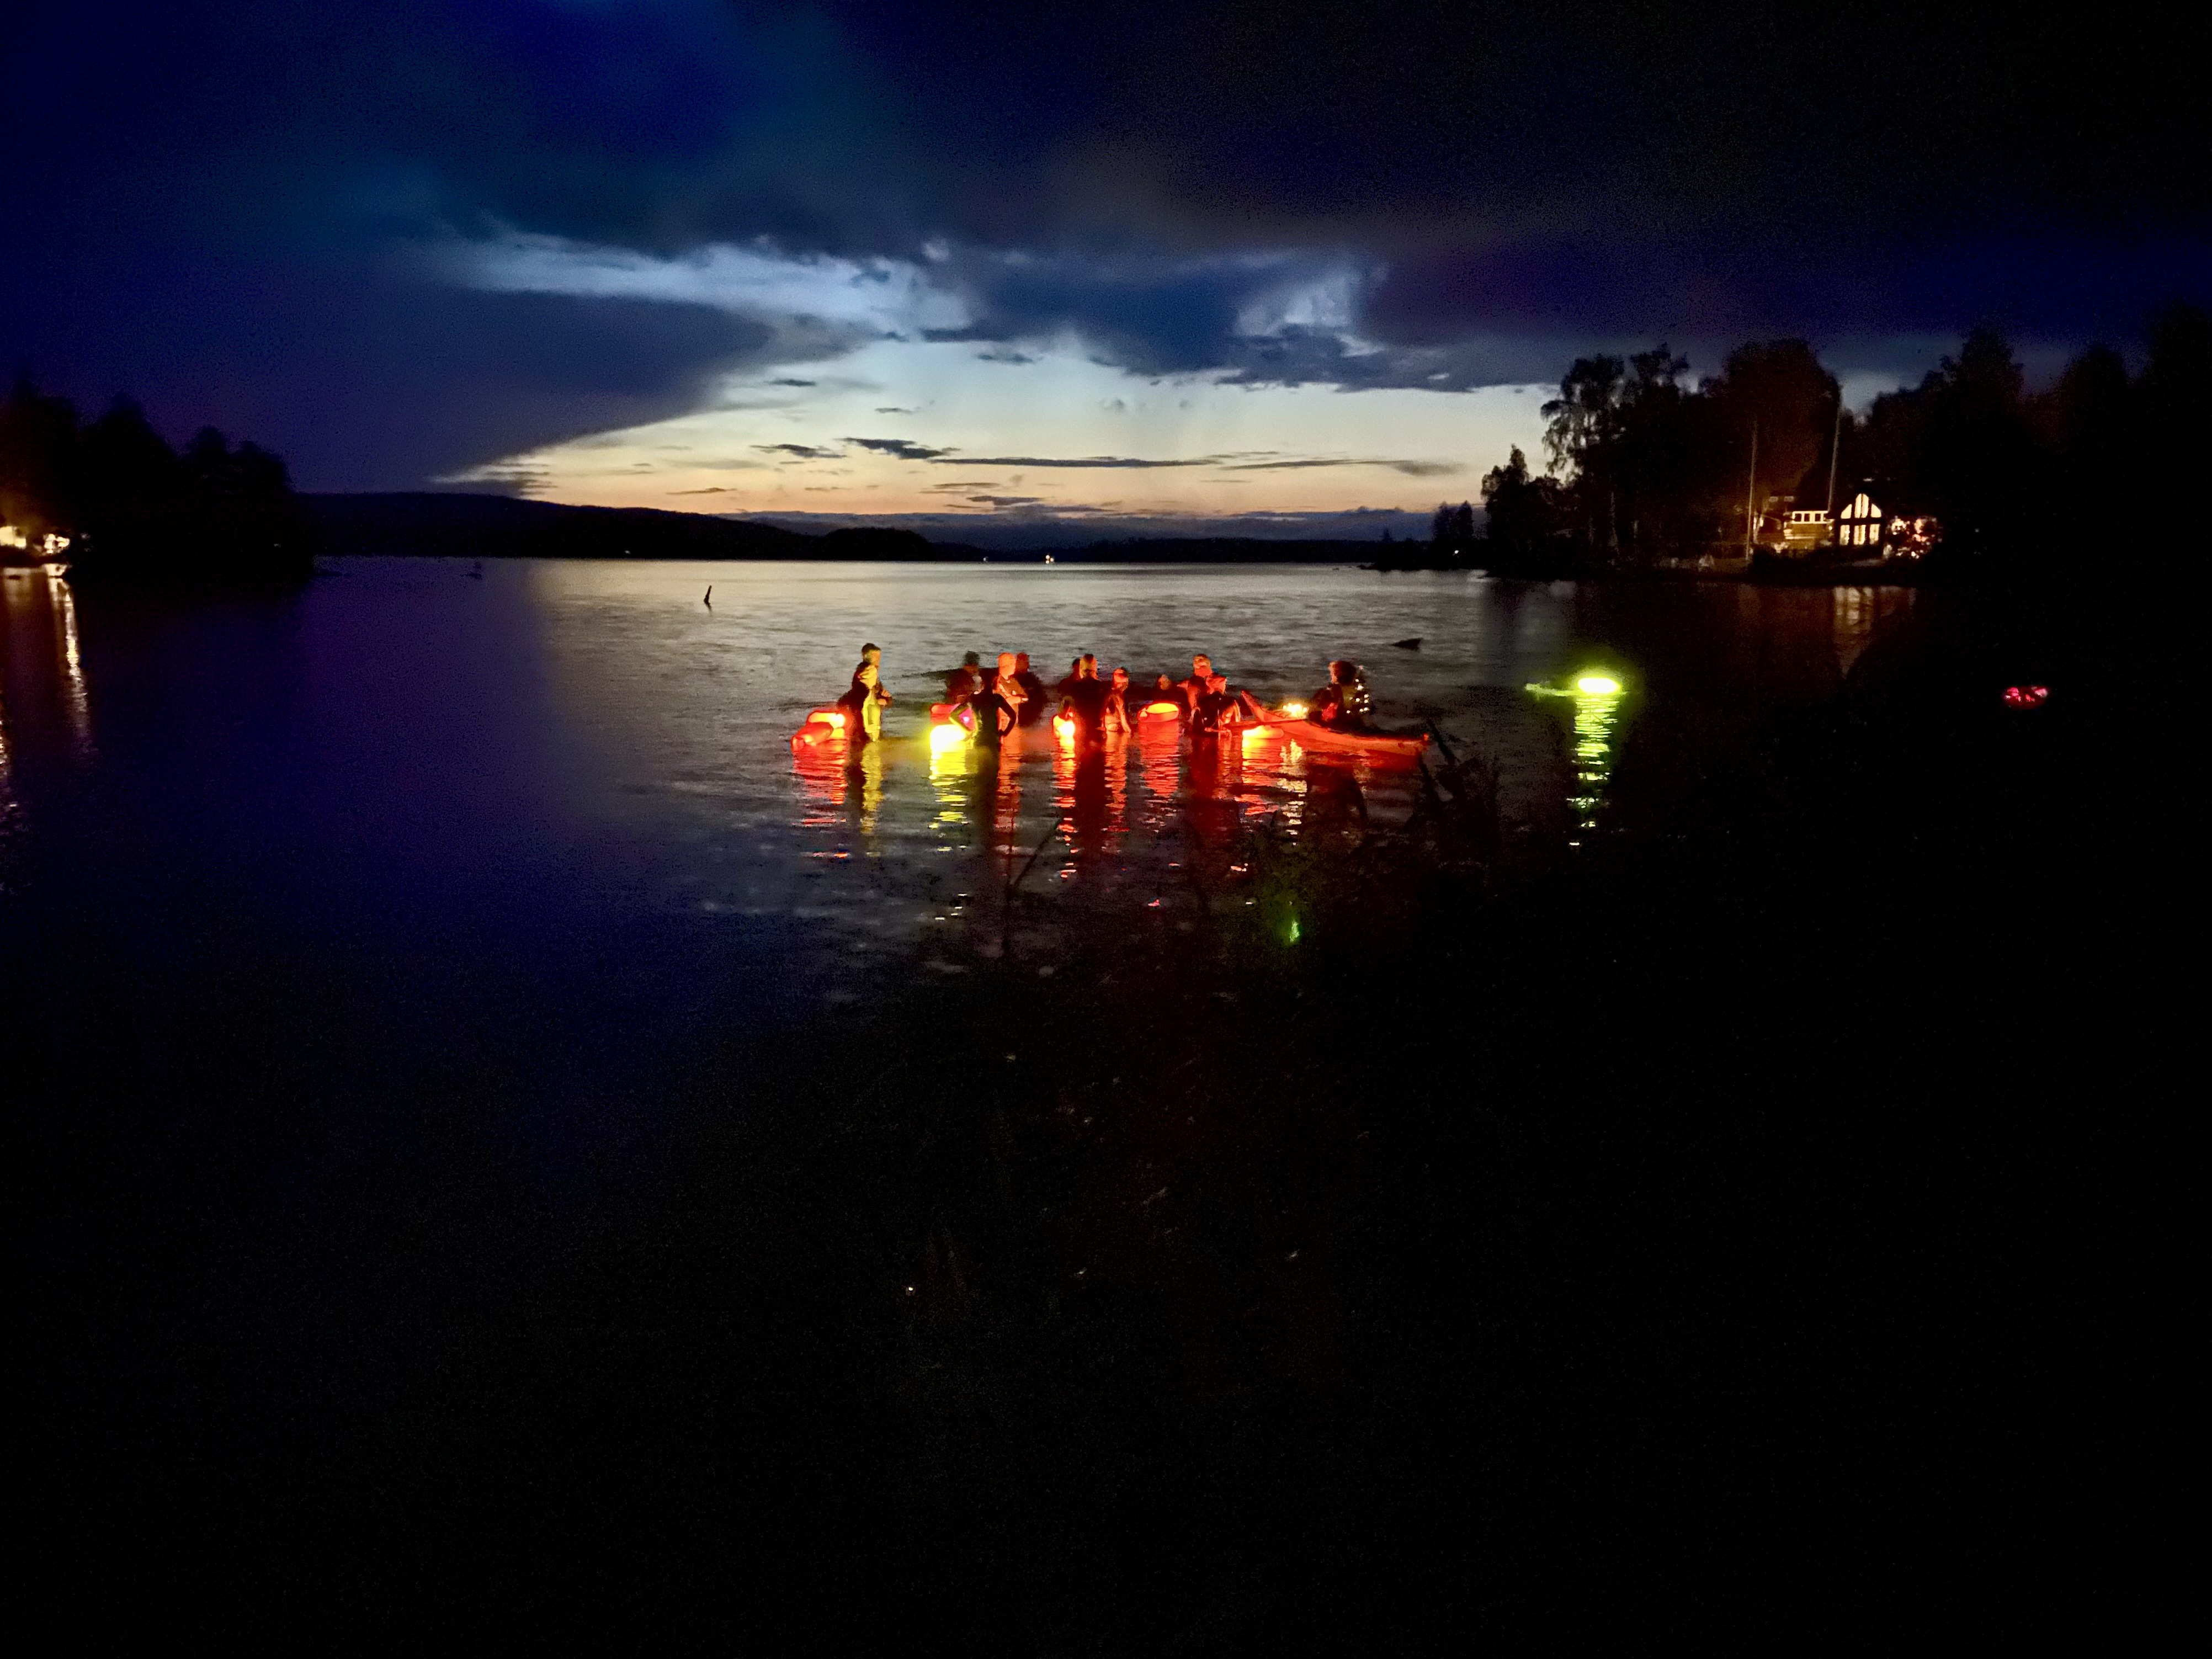
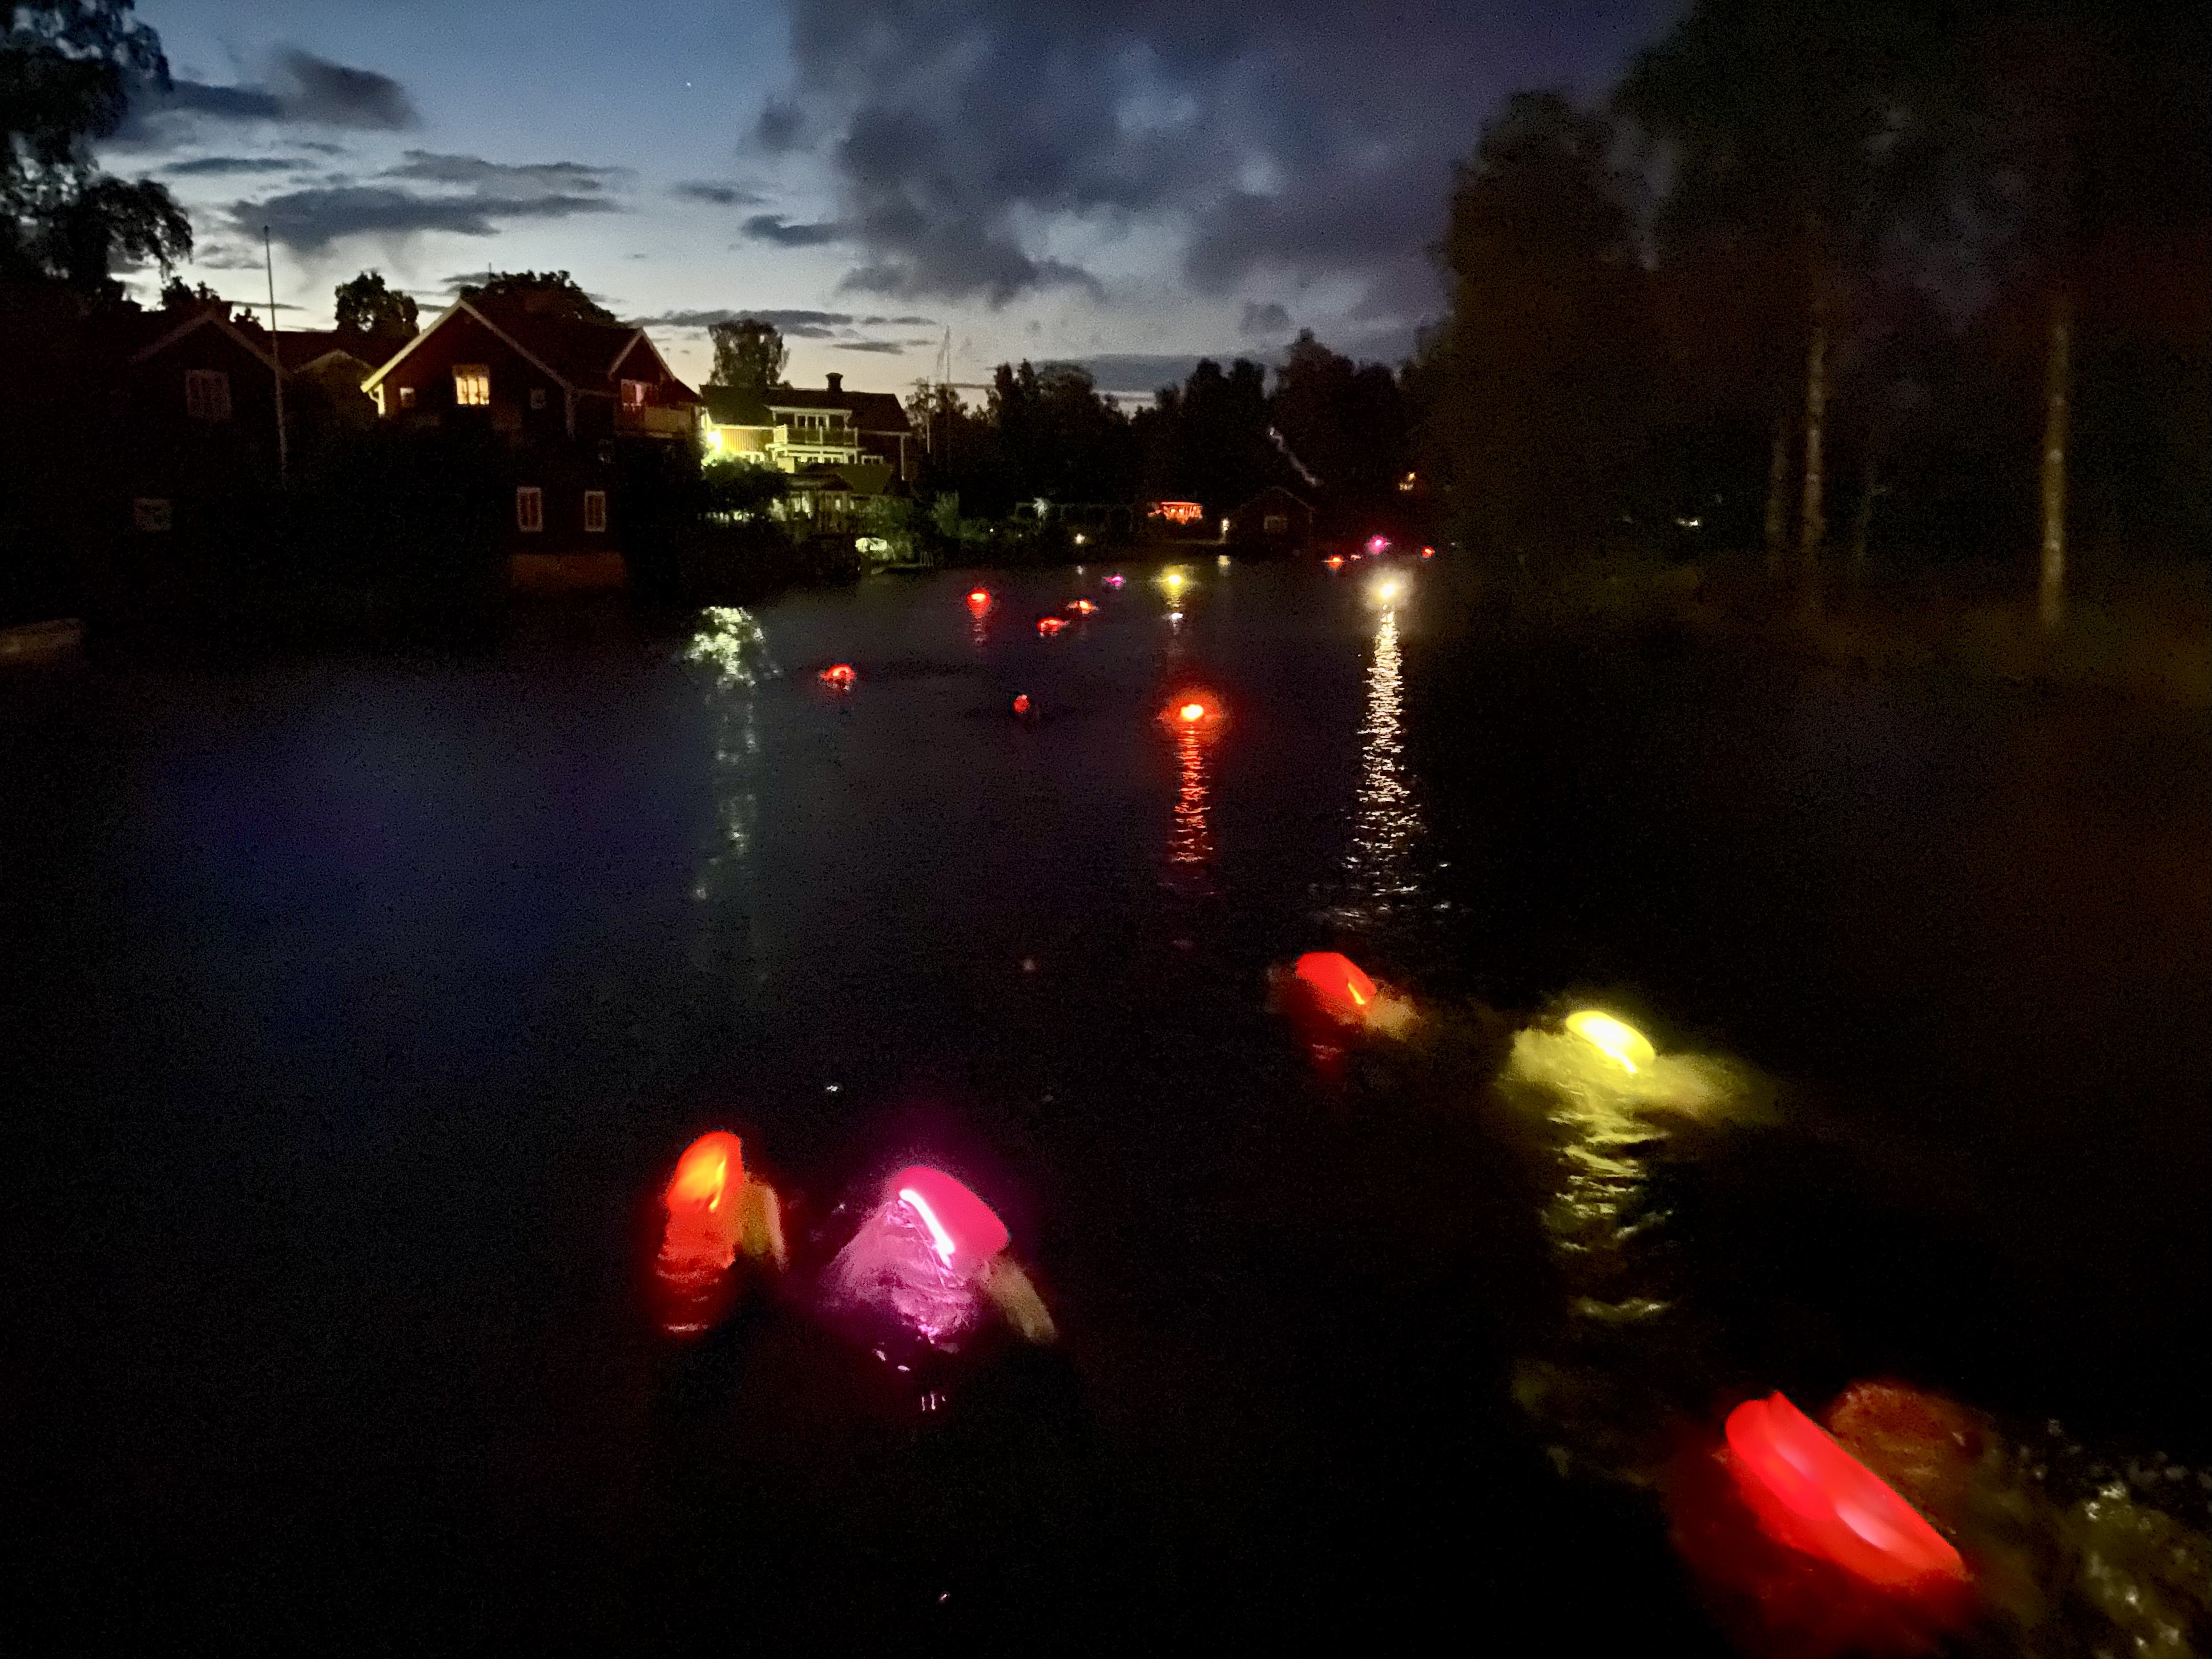
and tagged it with Midnight Swim Sundborn Tonight (midnight between the 31st of July and 1st of August) was the ”Midnight Swim” here in Sundborn, where a bunch of swimmers swim from the damm next to Carl Larsson Gården upstream to the church and then back downstream again. It seems to be an annual thing and I heard about it last year but was too tired to check it out, something I regretted the day after when I saw photos of it and read about it in the paper.
So this year I decided to go regardless of whether I was tired or not and I’m so glad I did. It was really cool to see the lit up buoys (the right word?) that the swimmer dragged with them in the dark, and the speed they managed when they headed back downstream was simply amazing.
Here’s some photos:
 Henrik Carlsson posted this
note
on
and tagged it with Maratonmarschen Reading Stephen King The Long Walk
Henrik Carlsson posted this
note
on
and tagged it with Maratonmarschen Reading Stephen King The Long Walk 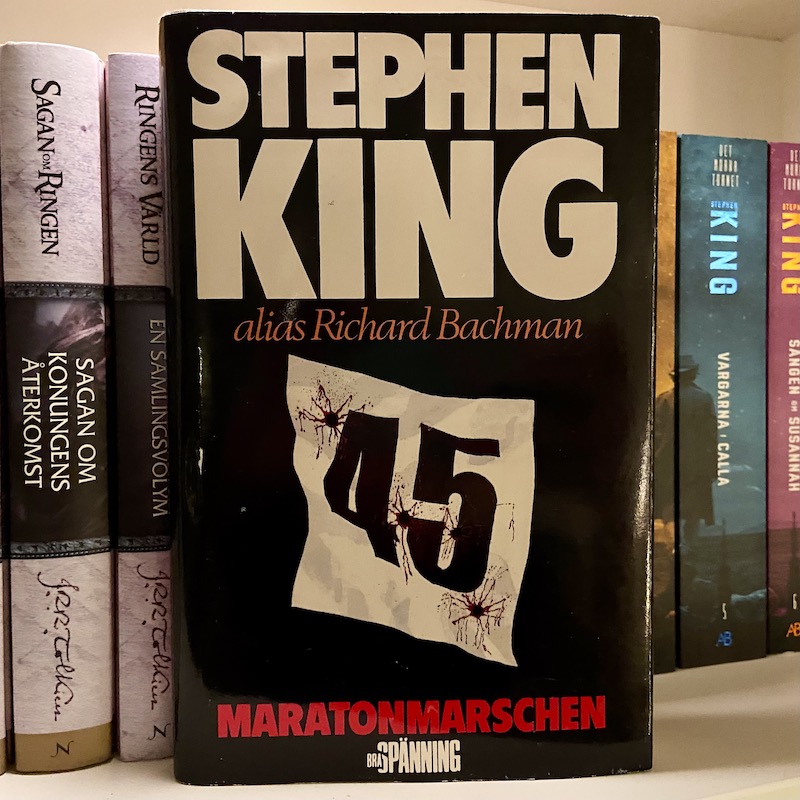 I’m currently reading ”Maratonmarschen” by Richard Backman. It’s the first book I’m actually reading (as opposed to listening to) in a long while and it’s hard to get into the habit of reading. I’ve only gotten a few pages in but it’s really good.
Henrik Carlsson posted this
note
on
and tagged it with A day in the life We’ve lost so much routine for the mornings and evenings during the summer holiday. Tonight Iris didn’t get to bed until 11 pm and Ebbe was up even later. We need to do something about this, but I’m not sure what.
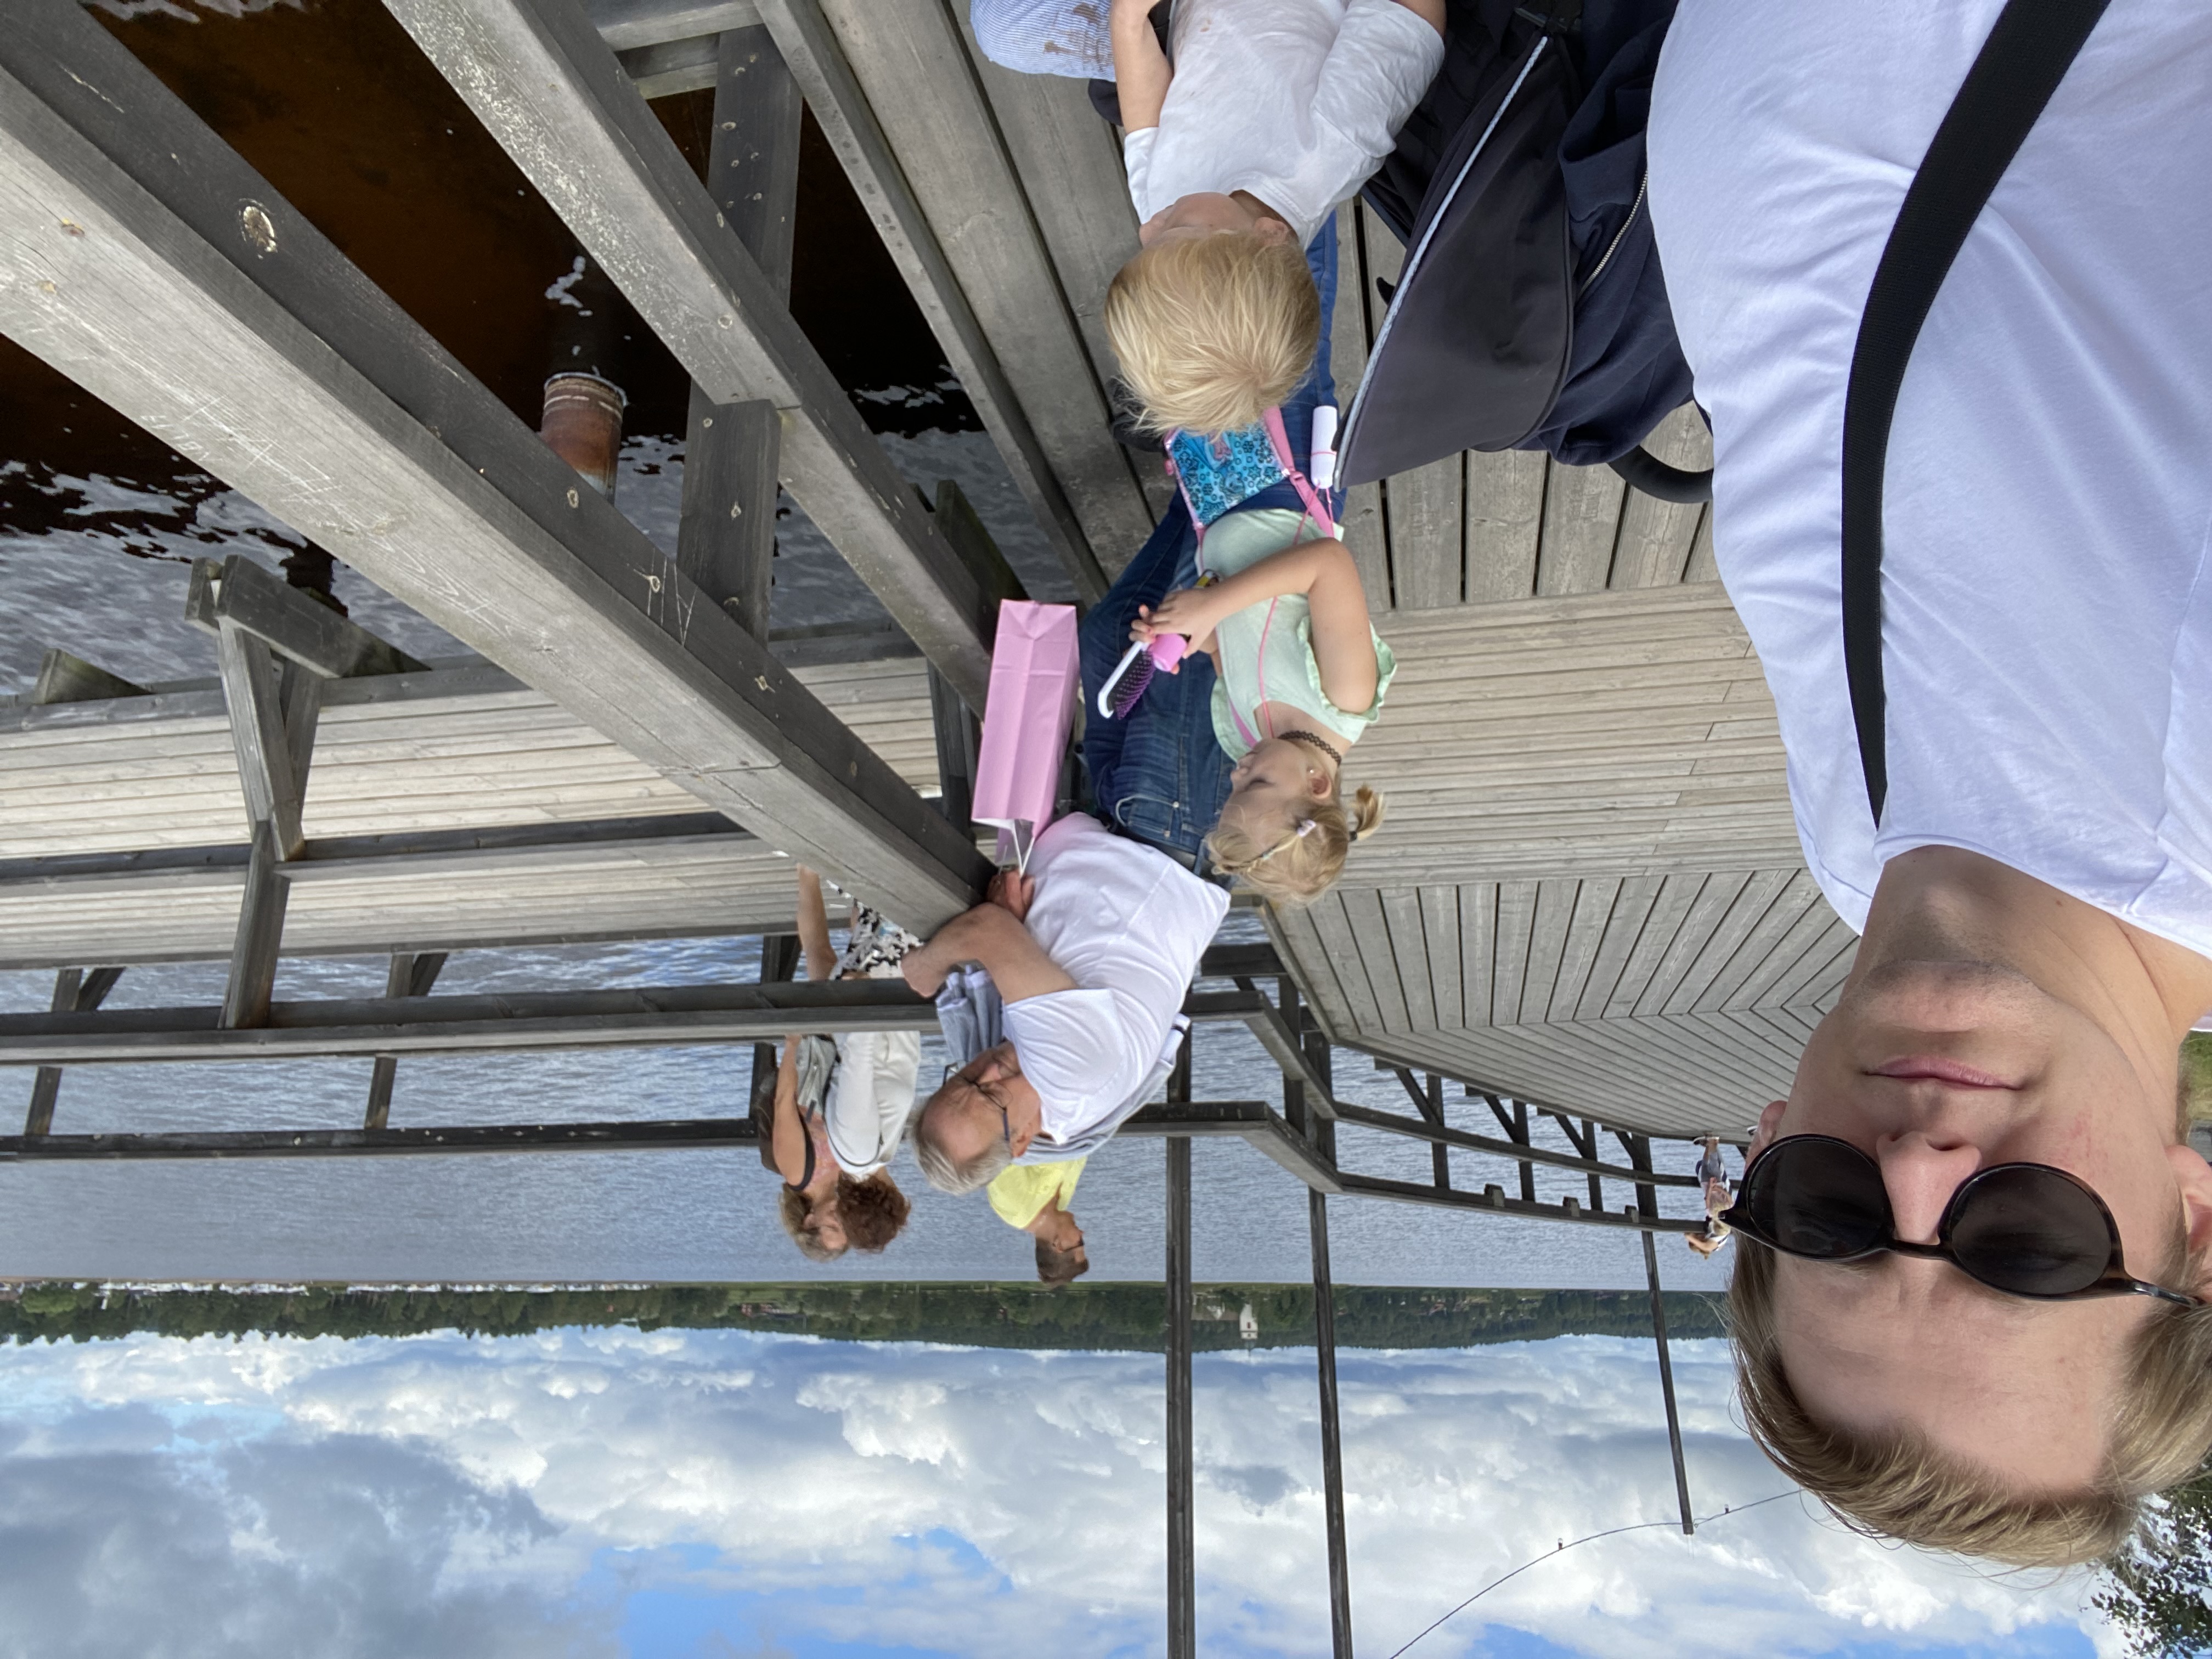
Today the kids and I took a trip to Rättvik and hung out with my father for a few hours, had Rättvik’s Ice-Cream and strolled on the boardwalk. Then we took an extended drive for the way home just to keep us busy for a while. The kids are really easy to go on long car trips with. They love to be in the car.
Linn has been doing a lot of cleaning and picking up an order of groceries and together we’ve mowed the lawn.
Tomorrow is Linn’s birthday, so I’ll need to get to bed soon.
 Henrik Carlsson posted this
article
on
and tagged it with Podcasts
Henrik Carlsson posted this
article
on
and tagged it with Podcasts Were podcasts that are ostensibly about something always this rambling, or has my tolerance gone down?
@MrHenko Not just you, I got rid of many podcasts I used to enjoy but no longer did for that same reason. Made room for some excellent new ones, so win-win.
@MrHenko At @HemisphericViews we work hard to keep things tight at around 45 minutes per episode, and when we go over there’s usually a good reason. Respect the listener’s time!
@canion @mrhenko 💯 this, one of so many reasons I love this podcast!
@pimoore @MrHenko Thank you! That is great to hear. It’s rewarding to know that the work is being enjoyed.
@pimoore Excellent feedback! Thank you!
@MrHenko Not just you. Lazy presenters wasting everyone’s time. It might take you 15 minutes to cut 5 minutes of fluff, but if you’ve got even 100 listeners you just saved the world 500 minutes!
@jeremycherfas A terrific perspective. Too many people don’t think about the hours wasted in meetings!
@jeremycherfas ”Each of these Quarterly Meetings were large and sat near eight hours. Here I had occasion to consider that if is a weighty thing to speak much in large meetings for business… In three hundred minutes are five hours, and he that improperly detains three hundred people one minute, besides other evils that attend it, does an injury like that of imprisoning one man five hours without cause.” — The Journal of John Woolman, 1758
@JMaxB not much has changed down the years. Thanks for that.
@pimoore Glad to hear I’m not the only one. Part of the problem is probably that I’m falling out of love with the format of more ”personality driven” podcasts.
@canion That’s a good principle! I haven’t listened to Hemispheric Views (yet?), but I’ll put it on my mental list for when I want to add more podcasts to my queue.
@jeremycherfas That’s a good way to look at it, and Eat This Podcast is a great example of a podcast that gets to the point. 👍🏻
@MrHenko Thank you. Appreciated.
Henrik Carlsson posted this
note
on
Spectacular thunderstorm tonight.
Henrik Carlsson posted this
on
and tagged it with snapshots 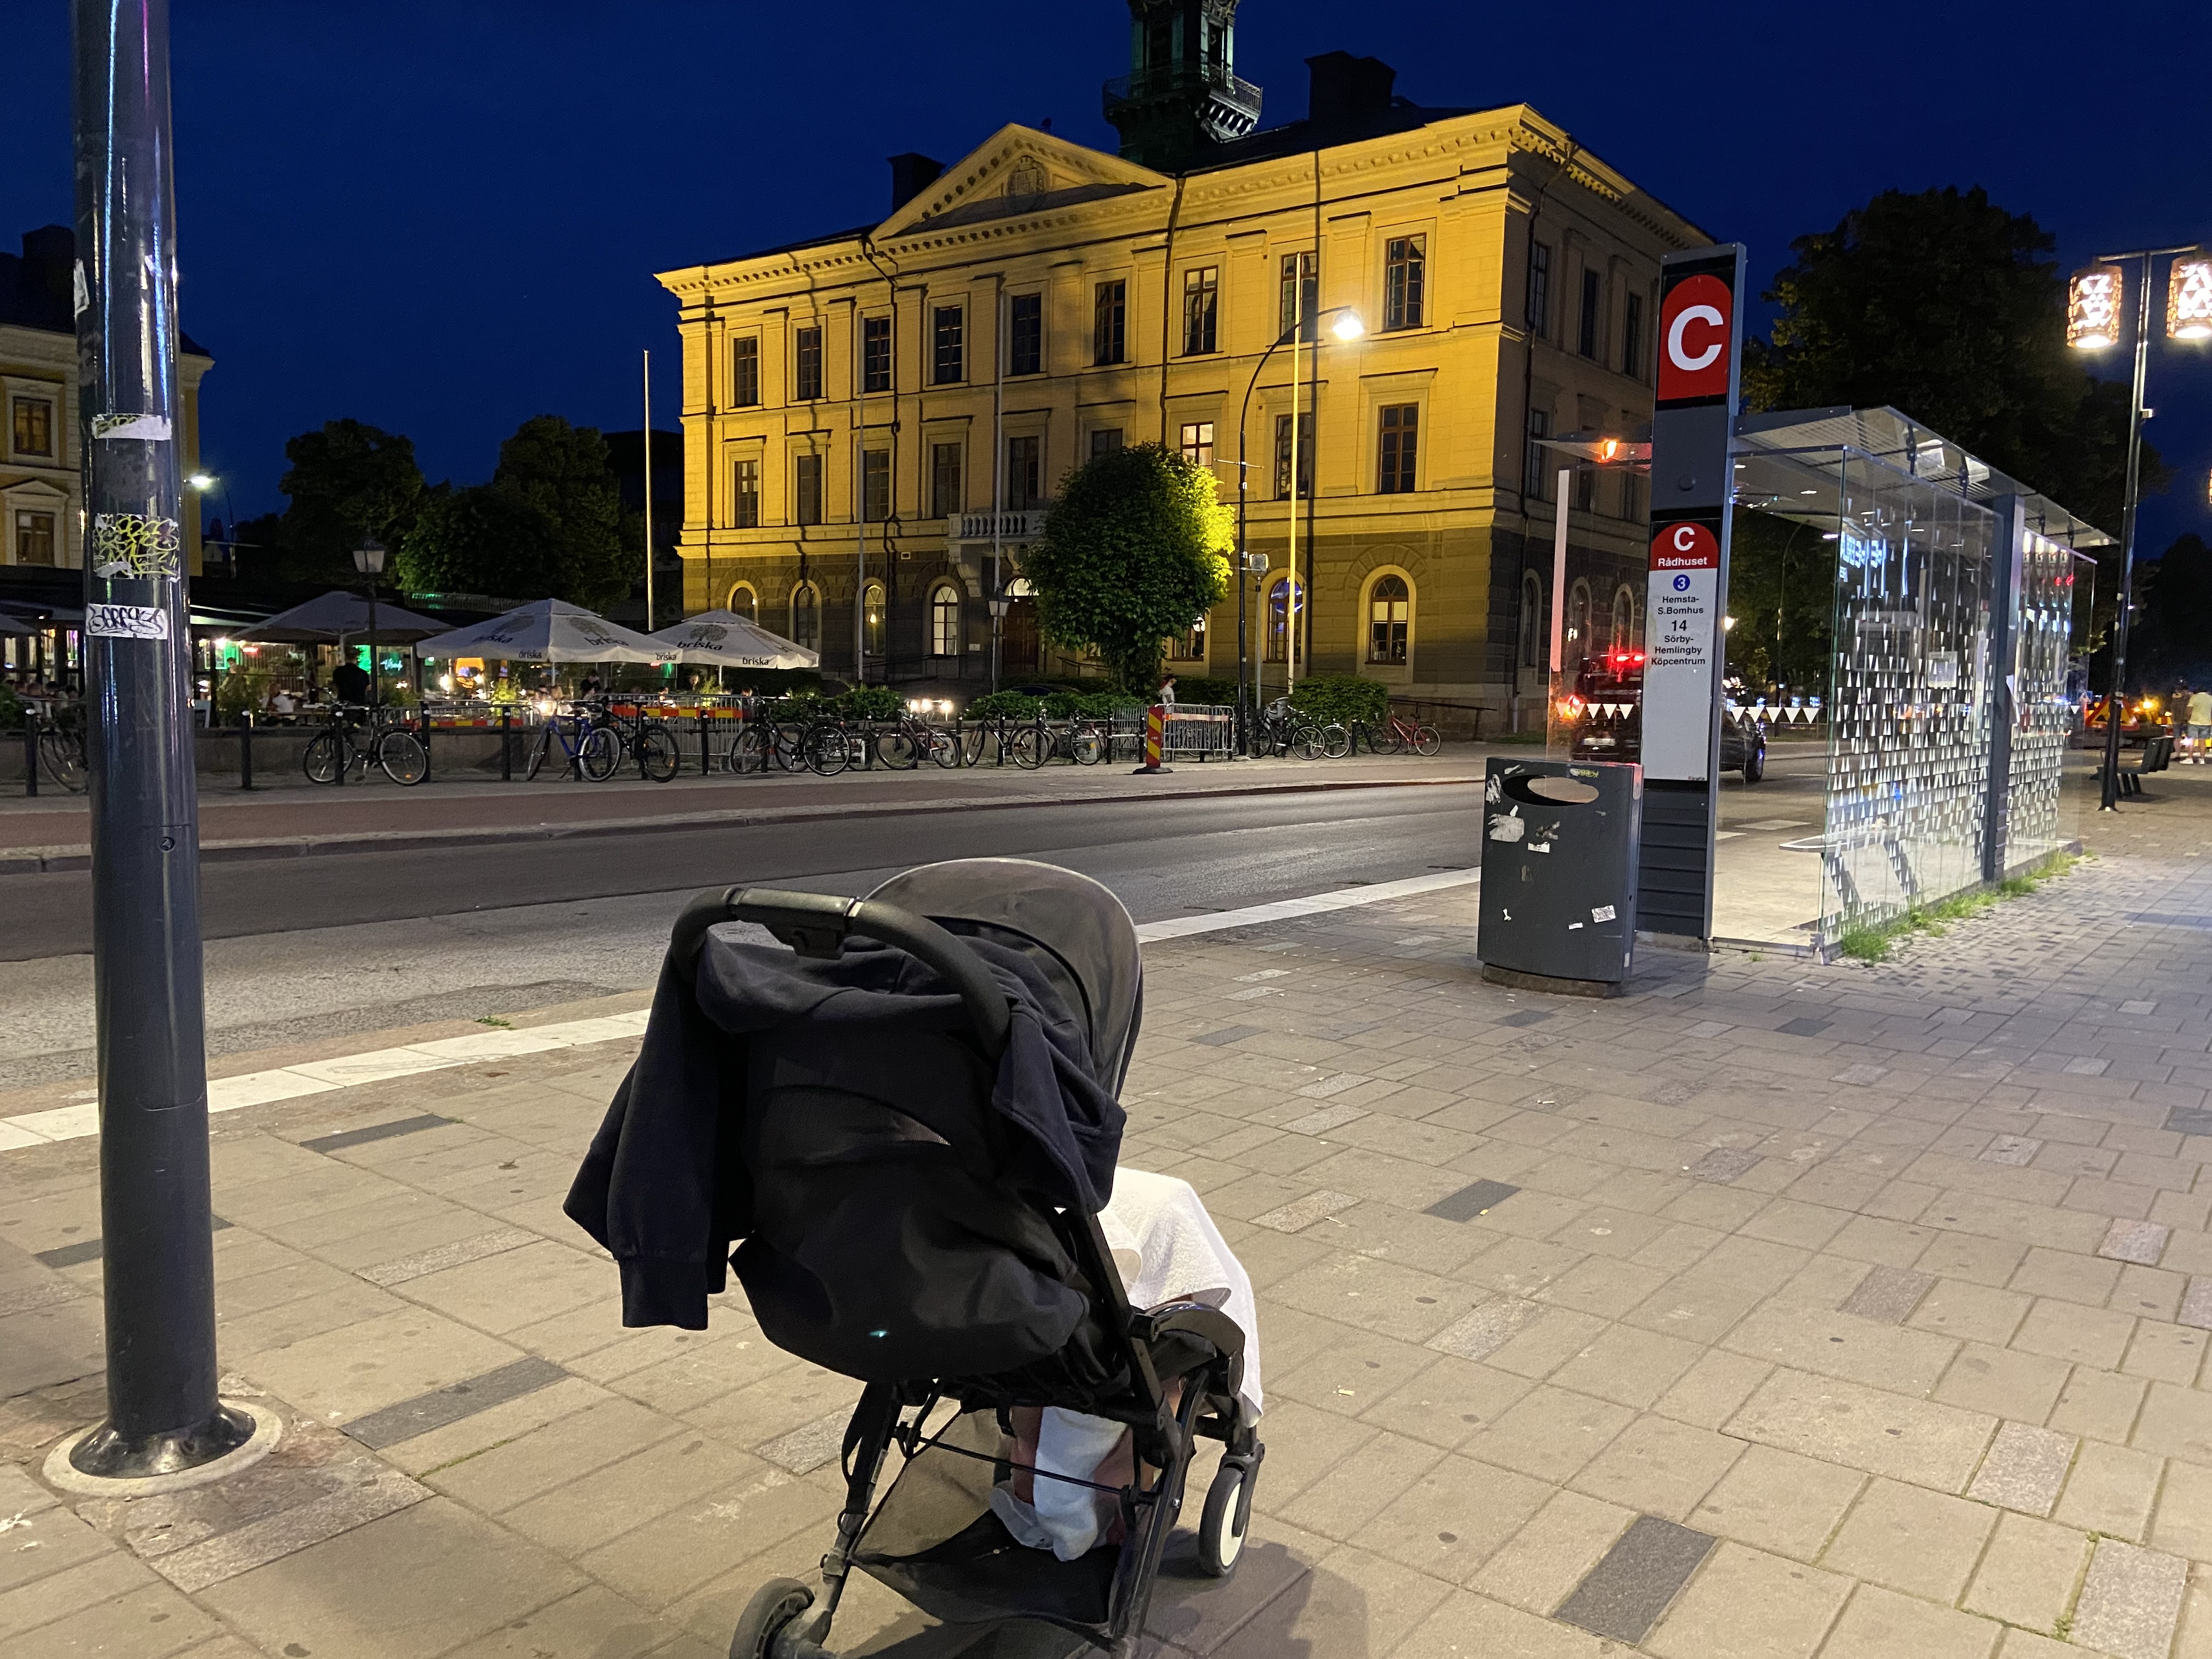
Well that turned out to be a much more interesting night than I had planned. Ebbe threw a tantrum and refused to go to sleep in the hotel room. Probably too many new things at ones. The only place he felt good was in the stroller so he and I went on a late night walk in downtown Gävle.
Just to be clear to international readers, in Sweden it’s extremely uncommon to walk around downtown with a child in a stroller at midnight. Uncommonly enough actually for a police car to stop next to us and chat to us for a while. They probably wanted to make sure I was not some kind of crazy person.
Anyway, once we had walked for a while he fell asleep and we are now back at the way too hot hotel room.
Henrik Carlsson posted this
on
and tagged it with snapshots 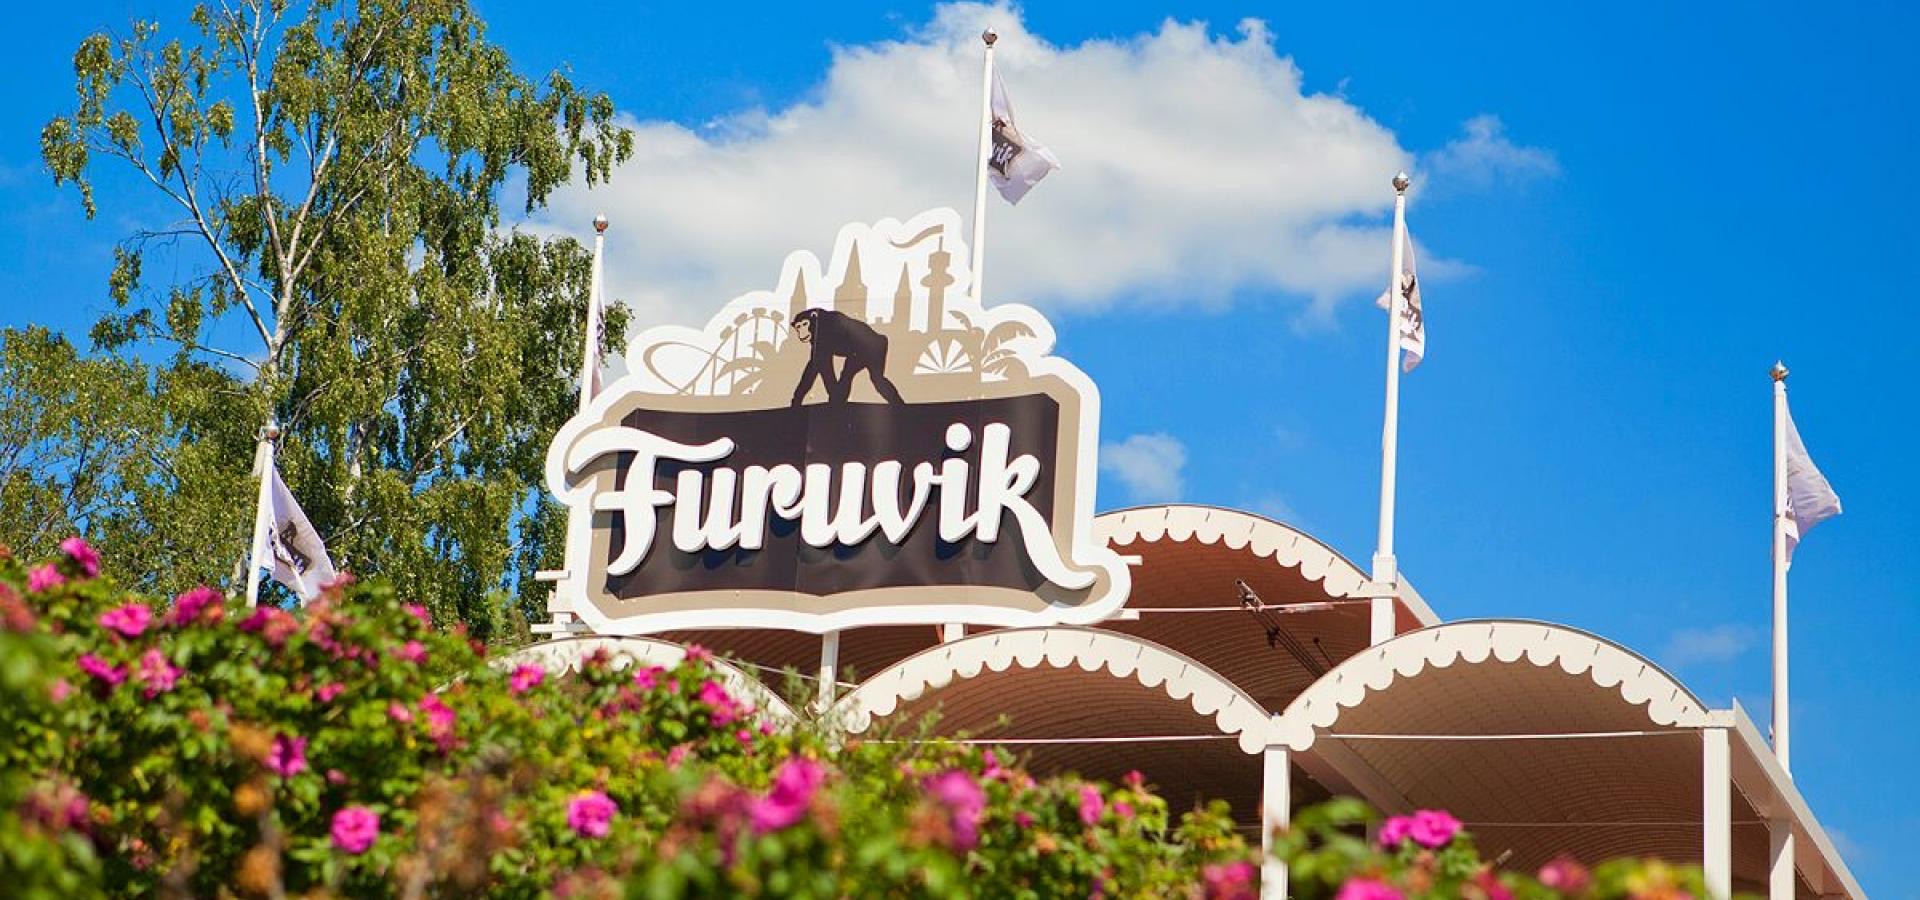
Today we spent the day at Furuvik, a theme park an hours drive from our home. Tonight we’ll sleep at a hotel in Gävle.
I’d be lying if I said that it has been smooth sailing all day. Getting everybody ready on time in the morning is a pain, and traveling with picky eaters is never fun, but on the whole we had a great day. Ebbe and I spent a long time in the animal park part of Furuvik while Linn and Iris went on rides (carousels?) and then we all met up for more rides. Turns out both my children loves that.
Henrik Carlsson posted this
note
on
and tagged it with Andy Weir Reading Seveneves The Martian 
Earlier today I started listening to The Martian by Andy Weir. I wasn’t really sure what I was in for but so far I love it. I see a lot of similarities to Seveneves actually. Space, dire situation, people desperately trying to solve problems both big and small with whatever they’ve got at hand.
Henrik Carlsson posted this
photo
on
and tagged it with Altan Deck Huset snapshots The House 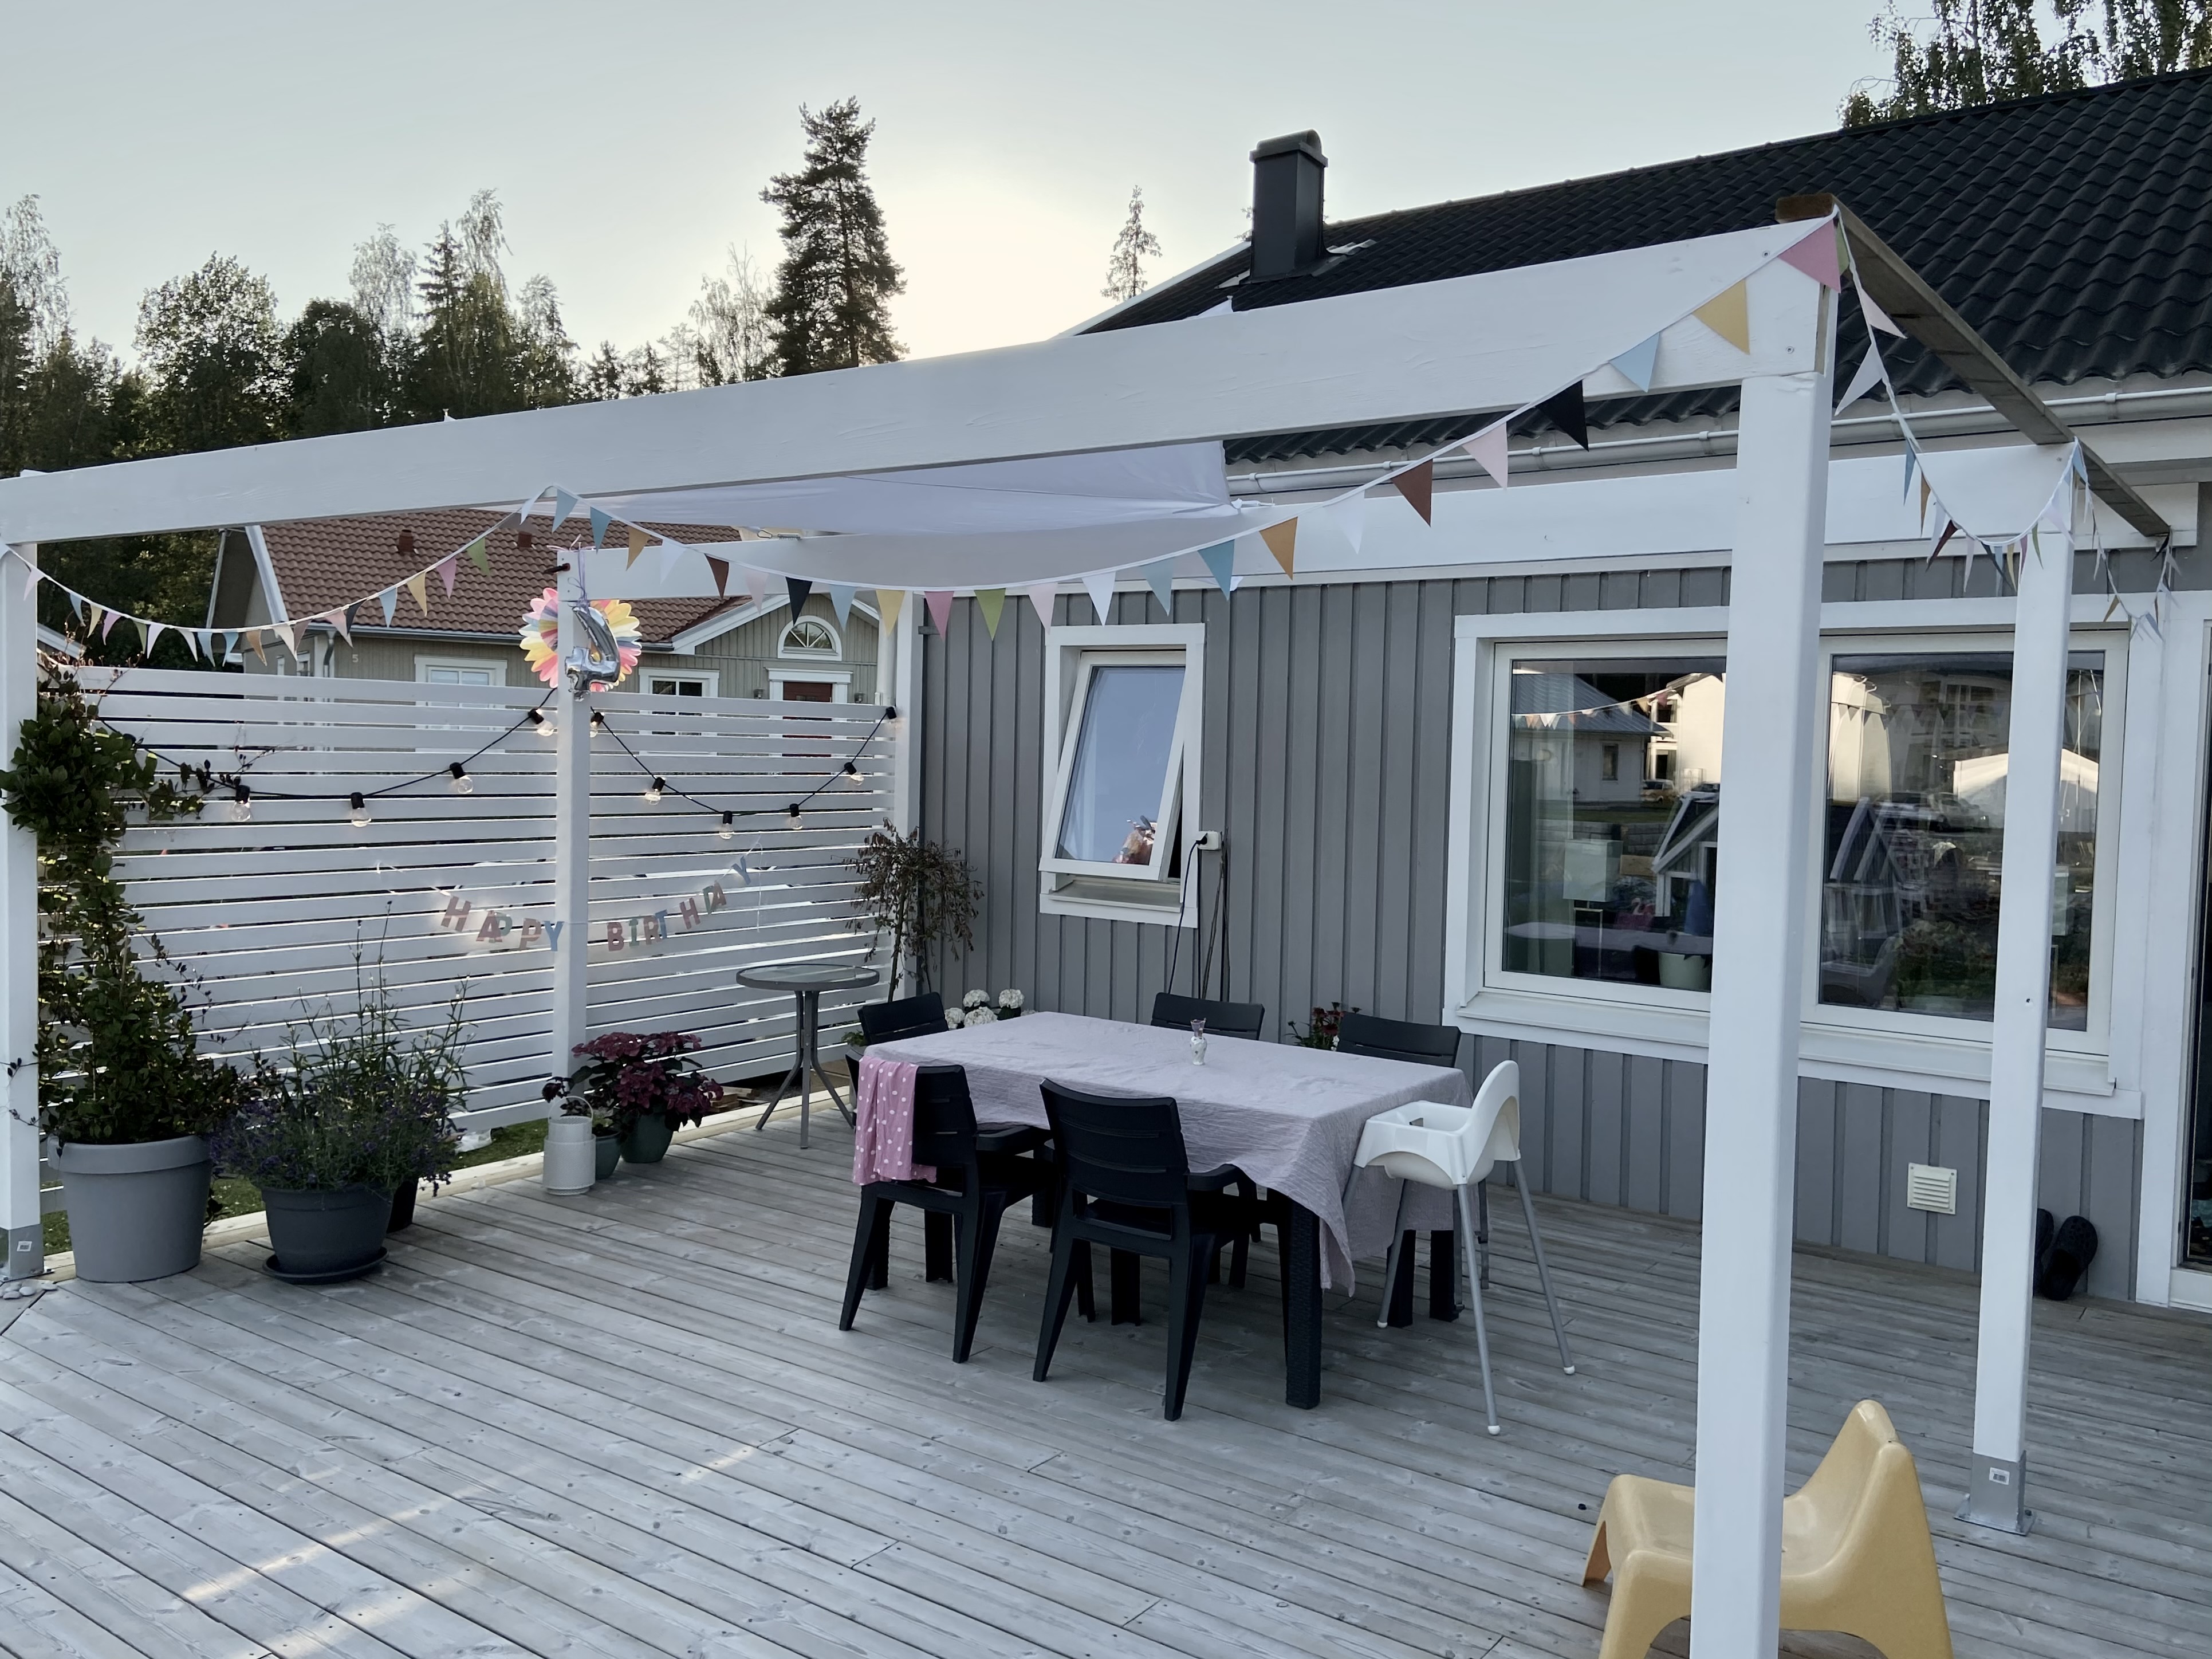
 ©
©
Replies and comments
Henrik Carlsson
1 augusti, 2021 23:00This Article was mentioned on blog.henrikcarlsson.se